
Drawing Basic Shapes
Learn to draw with the Select, Point, Line, Rectangle, Circle, and Arc tools — enough to build your first closed profile.
You have a blank drawing in front of you. This chapter introduces the small set of tools you need to draw a simple closed shape.
Pingendum has a lot more drawing tools than these six — polygons, slots, ellipses, splines, and several variants of the tools below. Those are covered later, in Expanding Your Shape Vocabulary, once you have a reason to need them. For now, these six cover the vast majority of what you'll actually draw.
Prerequisites
Before you begin, ensure that:
- You've completed Starting a Sketch and are currently inside an active sketch (or know how to get into one).
Select
The Select tool is active by default whenever a drawing opens. Click it in the toolbar (or press Escape) any time you want to stop drawing and pick existing geometry instead — to move it, delete it, or apply a constraint to it later.
Clicking on empty space with Select active clears whatever's currently selected.
Box selection: direction decides the rule
Press on empty space and drag, and you get a selection box. Which way you drag changes what it catches, exactly as it does in other CAD packages:
| Drag | Mode | Catches |
|---|---|---|
| Left → right | Window | Only what's entirely inside the box |
| Right → left | Crossing | Anything the box touches or contains |
The box restyles itself as you drag, so you can see which of the two you're getting before you release — and dragging back across your starting point switches it live.
Use window to grab a shape without catching the long lines running past it; use crossing to sweep up everything in a region, which is usually what you want before a delete.
Adding to and removing from a selection
| Gesture | Effect |
|---|---|
| Click | Replaces the selection |
Shift-click | Adds to the selection |
Ctrl-click | Toggles that one item |
Shift+Ctrl-click | Removes from the selection |
All four work with a selection box too, so Shift-dragging a crossing box adds a whole region to what you already had.
Tip: reaching geometry that sits under other geometry
Click the same spot twice without moving and Pingendum cycles through whatever is stacked there rather than re-picking the top item. The status bar counts them for you — "3 overlapping items — click again to cycle", then "Candidate 2 of 3 — click again to cycle" — so you can step to the one you meant without moving anything out of the way.
Typing Exact Values While You Draw
Before the tools themselves, one thing worth knowing up front: you don't have to draw roughly and fix it later. Every tool below accepts typed numbers as you go.
Two places tell you what's expected:
- The status bar, at bottom left, names the step you're on — "Specify first point", then "Specify endpoint".
- A small input bar beside the cursor shows the fields you can type into, each with a short label and its unit.
| Tool | Status prompts | Fields beside the cursor |
|---|---|---|
| Line | Specify first point → Specify endpoint | L (length, mm) · Aabs (angle, °) |
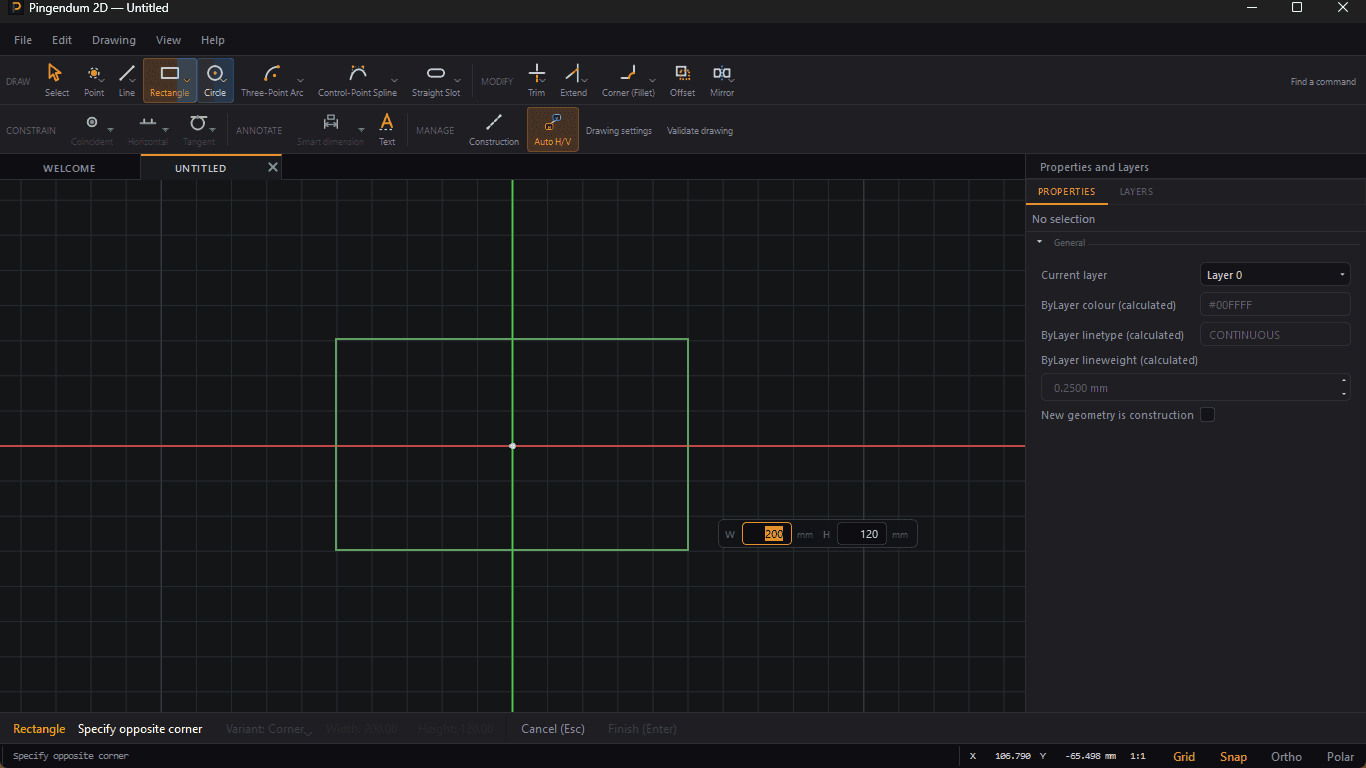
| Rectangle | Specify first corner → Specify opposite corner | W (width, mm) · H (height, mm) |
| Circle | Specify centre → Specify point on circle | Ø (diameter, mm) |
Type a number instead of clicking, press Enter, and Pingendum places the geometry at exactly that size — and adds the matching dimensional constraint for you, so the shape stays that size. That's the same kind of constraint the next chapter covers applying by hand.
Tab moves between fields when a tool offers more than one, so you can set a line's length and leave its angle to the cursor, or fix both. A field you've confirmed is marked as locked; the rest keep tracking the mouse.
Note:
Aabsis an absolute angleThe angle field is measured from the sketch's horizontal axis, the same way the on-screen 0–360° readout is — not as a bend relative to the previous segment. That's what the abs in the label is telling you.
Clicking rather than typing is fine too, and it's how the rest of this chapter is written. Just don't assume rough is your only option.
Point
Shortcut: P
The simplest tool — one click places a single point at the cursor location. Points aren't used to build closed profiles on their own, but they're useful as reference locations for other constraints later on.
Line
Shortcut: L
- Click to place the start of the line.
- Click again to place the end.
The tool stays active afterward, and the next segment starts from the endpoint you just placed — so a third click gives you two connected segments sharing a point, not two loose lines. Keep clicking to build a chain.
Ending, undoing and closing a chain
| Gesture | Effect |
|---|---|
Escape | Ends the chain, keeping what you've committed |
| Double-click | Places the last point and ends the chain in one gesture |
U | Undoes the last segment and carries on from the previous point |
C | Closes the chain back to its first point and ends it |
U is the one worth remembering — a mis-clicked point mid-chain doesn't mean starting over.
One line at a time, by dragging
If you don't want a chain at all: press, drag, release. That draws a single two-point line and ends there, ready to start a fresh one somewhere else. It's the quicker gesture when you're placing unrelated segments.
Note: Auto H/V adds constraints as you draw
With the Auto H/V button lit on the toolbar (it is by default), any segment you draw close to horizontal or vertical gets snapped to it and given a Horizontal or Vertical constraint automatically.
Turn Auto H/V off if you'd rather place everything by hand.
It applies to freehand segments — lines, polylines and the like. The Rectangle tool constrains its own four sides regardless, since a rectangle wouldn't be one otherwise.
Rectangle
Shortcut: R
- Click to place one corner.
- Click again to place the opposite corner.
This draws four connected lines at once, already joined at their corners — the fastest way to get a simple four-sided closed shape on the canvas.
Circle
Shortcut: C
- Click to place the center.
- Click again anywhere away from the center — the distance from your first click sets the radius.
If you type a value at step 2 instead of clicking, note that the field is a diameter, not a radius. Clicking sets the radius by distance; typing sets the diameter.
Three-Point Arc
Shortcut: A
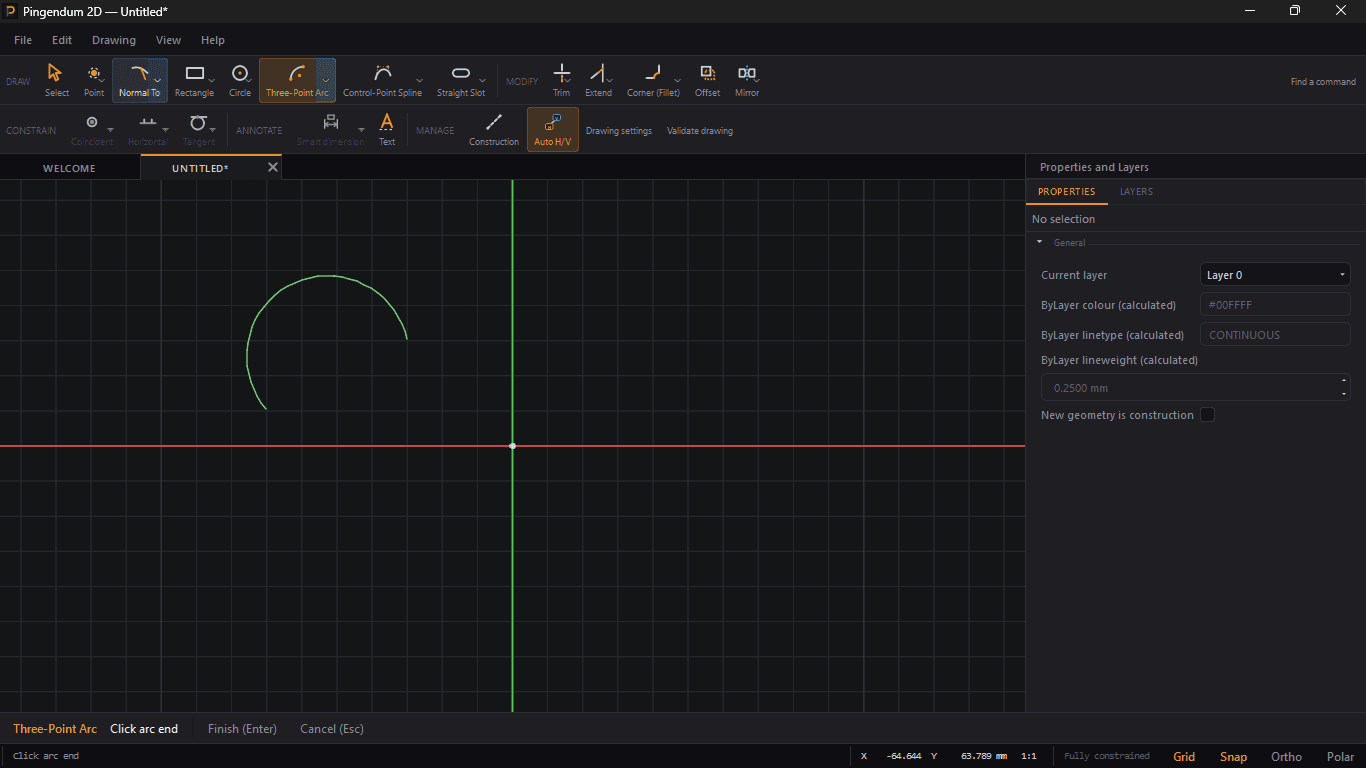
This is the simplest of Pingendum's several arc tools, and the one to reach for first:
- Click to place the arc's start point.
- Click to place the arc's end point.
- Click a third point that the arc should pass through — this determines the radius and which way the arc bulges.
If all three points fall in a straight line there's no arc to draw, and the prompt says so: "Points are collinear — click a different third point." Click somewhere off the line and it continues.
Putting It Together
With just Rectangle and Circle, you can already draw a wide range of simple profiles. Try drawing one rectangle now — press R, click one corner, click the opposite corner. Don't worry about exact size or position; the next chapter covers pinning it down precisely with constraints.
Note: Escape unwinds one layer at a time
Each press of
Escapedoes the next thing down this ladder:
- A value typed into the input bar? Cancel the entry. You stay in the tool.
- Something in progress? Discard the uncommitted step. You stay in the tool.
- A drawing tool active, nothing in progress? Fall back to Select.
- Select active, with a selection? Clear the selection.
Once there's nothing left to unwind, further presses do nothing. Pressing
Escapea few times to get back to a clean state is safe — it never discards committed geometry and never closes the drawing.
Tip: right-click does the same thing, with the mouse
A right-click unwinds the same stack: it cancels a typed value, then the step in progress, then returns you to Select. Only when there's nothing left to unwind does it open the context menu.
So right-clicking twice mid-draw is the fastest way to abandon what you're doing and get the menu — and a right-click that "just closed the tool" instead of opening a menu isn't a misfire, it's the first rung of the ladder.
Next Steps
You now know how to:
- Switch back to Select at any time, and predict what each
Escapepress will do - Place points, lines, rectangles, circles, and 3-point arcs
- Type exact sizes as you draw, instead of drawing rough and fixing it later
- Recognize the constraints Auto H/V adds on your behalf
- Draw a simple closed profile
Right now, whatever you've drawn is almost certainly not the exact size you want, and nothing is locked in place. That's what constraints are for.
Next: Constraining a Sketch
Starting a Sketch
Learn what a new drawing gives you, and get familiar with the parts of the workspace you'll use while sketching.
Constraining a Sketch
Learn to read the DOF indicator and use the constraints that pin down a sketch's size — Horizontal, Vertical, Length and Radius — and understand what currently stops a 2D sketch reaching zero degrees of freedom.